


Maian SOS
Complete dataDyne Defection to Skedar Ruins on Secret Agent to unlock this mission.
 You won't have much health so knock out guards often. |
 Grab the Psychosis Gun and shoot the scientist with it. |
 You can also break out by shooting the stretcher up against the window. |
 There's a load of guards ahead, you'll need to act quickly. |
 Disarm them before they pull off any shots at you. |
 Go through this door to reach the medical experiment. |
 Pick off guards slowly as you go down the corridor. |
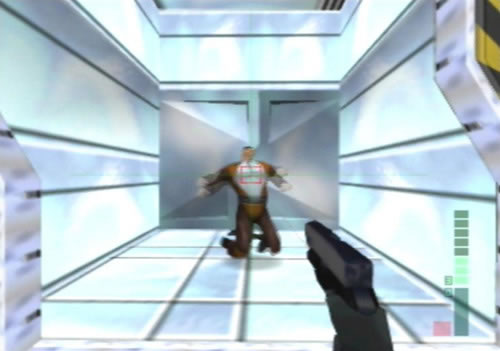
 Watch out for these two scientist's tranquilizers. |
 Disarm them if you can to stock up on tranquilizer ammo. |
 Stay outside the lab and shoot the stretcher from there. |
 Head down the long corridors towards the showers. |
 Watch out for guards up on the walkway ahead. |
 Clear out all enemies and climb up the ramp. |
 Go through the corridor ahead and look for this hole in the right wall. |
 Keep an eye out for guards below and pick off as many as you can. |
 Jonathan's explosive crate is already here, pity he isn't around yet. |
 Clear the enemies around and ride up the cargo lift. |
 Cross the corridor and go through the door to find this hangar. |
 Watch out for guards surrounding the saucer's hangar. |
 Ride up the elevator in the corner to reach the comms station. |
 Take it carefully around these guards. |
 The radio console's on the other side of these walls. |
 Shoot one down to get through, but watch out for the technicians. |
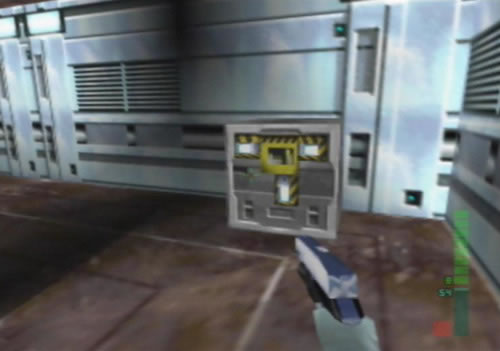
 Activate the console to send off the distress call. |
 All it takes is one technician to sedate Elvis. |
Agent
1. Activate distress signal
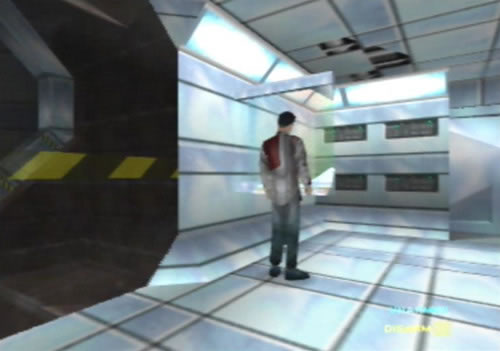
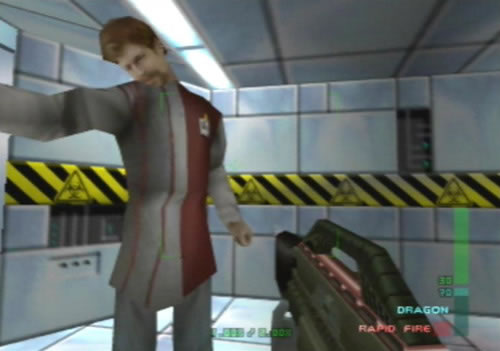
While Joanna works her way through the G5 Building in the Chicago mission, you'll be playing as Elvis and must send out a distress signal to the CI for help after the Maian Saucers carrying the Maian Ambassador were shot down. The bad part of this mission is that you'll start off unarmed, and only have a small amount of health. You'll begin in one of the glassed-off lab rooms. Once Elvis gets up off the stretcher and the mission begins, run around to the front of the technician in front of the control console. He'll spot you, then take out a Falcon 2. Quickly disarm him, then wait to see if he takes out another Falcon 2. If he does, disarm him again or just knock him out. Go through the door ahead, then quickly disarm the second technician by the table.
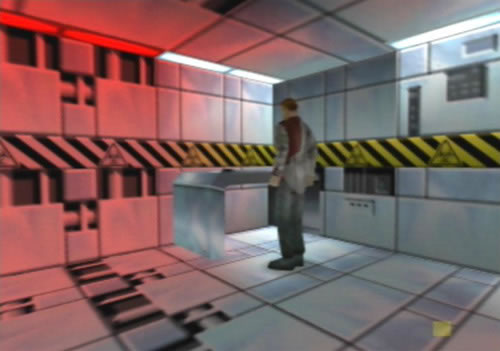
Disarm him again if he pulls out another Falcon 2, otherwise just knock him out. Grab the Psychosis Gun on the table then head back in to the lab. Take out the Falcon 2, then push the stretcher up to the glassed wall and make sure it stays right up against the glass. Back up, then pump five shots into the stretcher to blow it up to destroy the glassed wall. Once out of the glassed-off lab, switch to Disarm and head up to the next door. Open it and quickly disarm the guard standing inside carrying a Dragon.
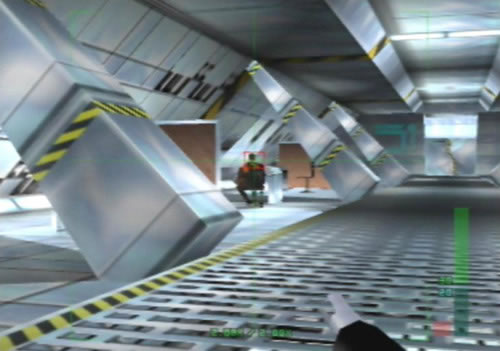
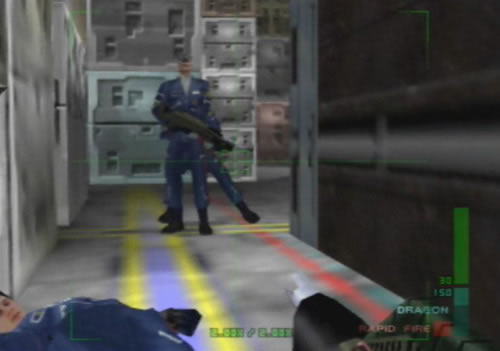
Once he calls out, three more guards from outside in the long hall will come in, quickly throw the proximity Dragon into the small room as the second door opens, then quickly dash back to the side of the door so the guards can't see you. Once the Dragon blows, head out with the Falcon 2 equipped, blast any guards that weren't caught in the explosion then grab all the Dragons on the ground. Head over to the end of the hallway, then go out to the main corridor. Down the right in the left cryo room is a guard which has double LX's, if you ever need to, head down there, blast the three other guards and hit the double-LX guard with the Psychosis Gun.
He has unlimited ammo and can be a great protector while you advance through the base. If you decide not to bother with the double-LX guard, head left, then knock down the patrolling guard and keep going over to the sloping corridor. Head up, then go down the ramp on the right. Halfway down two guards will be standing in front of two doors on both walls of the hallway, slowly edge down and try to pop them in the head before they spot you. If one spots you, both will attack so get ready to fire quickly. Head down to the bottom of the ramp, then open the door and head into the large hangar. Wait for the guards up on the metal platforms and the one over in the corner to run at you, then quickly backpedal up the ramp behind you and wait for the guards there.
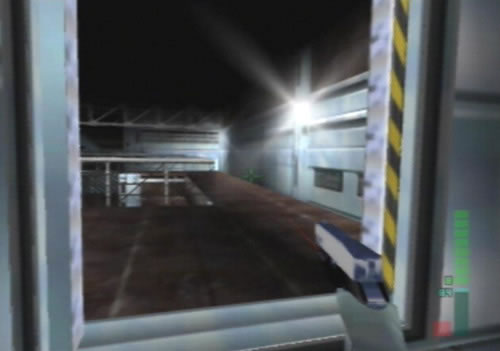
As they come through the door, pop each one, then head into the hangar and go over to the ramp straight ahead. Head up, then at the top head left. Go through three doors, you'll hear an alarm go off, ignore it, then walk over to a hole in the wall on the right. Beyond the hole is the large room with the stacked crates, look down and blast the two guards below before dropping down. Drop down, then head over to the large elevator behind the crates. Several guards will be around, take cover and blast them all before heading into the elevator. If any guards are up above waiting for the elevator, you could wait for them to come down or just head in and blast them as you ride up the elevator. Once on the upper level, head down to the right up to the door at the end of the platform.
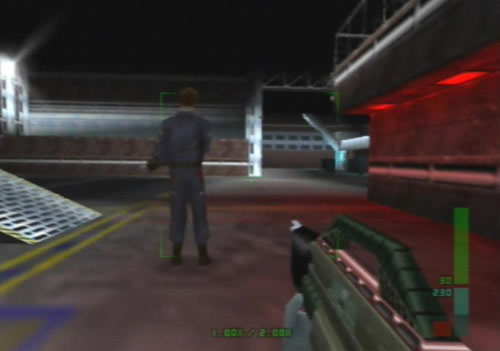
Stand up against the right corner of the door, take out the Psychosis Gun, then open it. A guard will be standing directly in front of you, infect him so that he fires at the other guards to draw their fire. Take out the Dragon again, then quickly dash into the hangar and up the ramp on the left. Go around to the elevator across the metal platforms, blast the two guards you pass by, then call the elevator down. Ride it up one floor, then quickly blast the guard just outside the elevator (sometimes this guy might ride down the elevator to come after you). Head through two doors on the left, then carefully edge around the wall and pop the two guards at the end of the corridor on the right. Open the next two doors and you'll reach the room above the large hangar elevators.
You should spot two technicians straight ahead, quickly blast them before they hit you with their Tranquilizers. Once they're down, shoot out one of the wall partitions on the left so that you can get around to the communications radio. Blast the two technicians here, then walk up to the console on the wall and press B to send the distress signal to complete the mission.
Special Agent
1. Sabotage enemy medical experiment
This time you'll have to destroy the remains of the Maian Ambassador in the other glassed lab. Once you begin, run around and disarm the first technician when he pulls a Falcon 2, then head into the other room and disarm the second technician. Don't forget to take the Psychosis Gun on the table, then head back into the lab and use the stretcher to destroy one of the glass walls to escape. Switch to Disarm, then quickly disarm the guard beyond the next door and plant a proximity Dragon on the floor there to blow all the guards that appear. Once they're down, grab the ammo they dropped and head through the hallway to the main corridor.
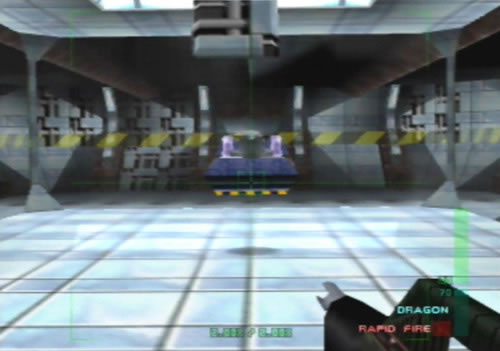
Go right to find the double-LX guard in the left cryo room, otherwise head left, knock down the patrolling guard, then head through the next door on the left. You'll now be in the hallway leading to the other lab. On the way, several guards will be seated at the desks, pop each one in the head with one shot from the Dragon so that you don't catch their attention. Once you're at the end, head in and go into the glassed-off lab area. Knock down the two technicians (one will drop Psychosis Gun ammo), then while standing in the room off the lab, fire five shots into the stretcher with the Ambassador's body on it to destroy it to complete objective 2, but you must do it from afar as the explosion can injure you.
2. Activate distress signal
Leave the lab and head back through the long hallway back to the main corridor. Head left and go up the sloping corridor. Once at the top, head down the right towards the hangar. Halfway down, carefully edge down and zoom in on one of the guards standing by the doors. Pop one, then finish off the second quickly. Head down to the hangar, rush in, grab all the guards' attention, then rush back up the sloping hallway and wait for the guards to appear through the door, then pop each one.
Head into the hangar and go straight over to the ramp ahead. Head up, then head left, through three doors (the alarm will go off), then look through the hole in the right wall, pop the two guards below and jump down. Head around to the large elevator behind the crates, then carefully finish off the remaining guards patrolling around. Ride up the elevator and finish off any guards waiting for you at the top. Head right and go up to the door at the end of the passage. Take out the Psychosis Gun and shoot the guard behind the door. Head into the hangar and rush up the ramp on the left, then head over to the elevator, pop the guards on the way.
Ride the elevator up one level, blast the guard just outside the elevator, head left through two doors, pop the two guards at the end of the corridor, then head into the communications room. Blast the two technicians, then blow down one of the wall partitions on the left. Finish off the two remaining technicians, then activate the console on the wall to send the distress signal to complete the mission.
Perfect Agent
1. Sabotage enemy medical experiment
You'll need to destroy the captured Maian Saucer in this mission as well as the other two objectives. You'll need to be more careful than ever, one guard is all it takes to ruin your day. Once you begin, head around to the front of the technician and grab his attention. Disarm him every time he pulls out a Falcon 2, then knock him out and head through the door behind you. The other technician might have opened the door already, quickly disarm him and try to get as many Falcon 2's out of him as possible. Once both technicians are unconscious, grab the Psychosis Gun on the table, then push the stretcher up to the glass wall. Stand back and pump five shots into the stretcher to destroy it and the glass. Switch to Disarm and head up to the next door.
Open it and quickly disarm the guard there, then press Start, select the Dragon and quickly throw the proximity Dragon into the small room, by the time you throw it the other guards from beyond the door will have appeared. Step back into the lab out of sight and wait for the Dragon to blow. Sneak out to see if any guards are left, if there are, wait here for them, then quickly disarm them as they come into the room. Knock the remaining guards out, and don't forget to grab all the ammo on the ground. Head down the hallway, once you reach the main corridor, head out and go left. If the patrolling guard has his back to you, quickly run up and knock him out, but if he spots you, go back into the hallway and wait for him to come, then quickly disarm and knock him out.
Head down the main corridor and go through the door on the left wall (if you want you can head right and try to hit the guard in the cryo room with double LX's with the Psychosis Gun, you'll have to face three other guards before reaching him, but he will make a powerful ally). Through this hallway, three guards will be seated at desks on the left and one on the right. Take out the Dragon, then crouch right down and carefully edge around the first diagonal pillar on the left (stay back from it), then you should spot the first guard at a desk. Pop him in the head with one shot so that the others don't hear you. Go over to the right of the hallway and look further down the left side for the next guard. Pop him, then move forward on the right side, you should eventually spot the third guard on the left far off.
Pop him, then slowly edge out to the left for the final guard, once you see him at a desk, he'll probably spot you as well, quickly pop him then grab all the ammo the guards dropped. Head through to the lab, then enter it, but wait for the two technicians inside to come out after you. Stay near the door leading to the glassed-off room, then once they come out quickly disarm both. Knock them both out, then while standing in the room off the glass-walled lab, use the Falcon 2 to pump five shots into the stretcher to destroy the remains of the Ambassador to complete objective 1.
2. Destroy captured Maian saucer
Leave the lab and head back down the hallway to the main corridor. Head left, then go up the sloping corridor. Go right, down the sloping corridor, then once you spot the next level floor halfway down the corridor, crouch down and edge your way down. Try to get one of the guard's heads on either side of the corridor in view, pop him, then quickly zoom in over to the other guard, he'll jump out from his post so you'll have to be quick. Head right down to the bottom of the corridor, then open the door and rush into the hangar. Five guards inside will spot you and charge, quickly race back into the corridor and stand up near the level floor halfway up the sloping corridor. Zoom in on the door below and wait for the guards to appear.
Once they come through, try to pop each one, just make sure you don't give them a chance to fire. Once all five are down, head down and go into the now-empty hangar. Rush over to the ramp opposite the door, head up, then go left. Head through three doors, ignore the alarm, then look down through the hole in the right wall. Quickly blast the guard below, then jump down and go over to the right of the crates. Check for any guards ahead, blast them if you see any, then head around to the left side of the crates and grab the attention of the patrolling guards. Blast each one as they charge at you, hide if they fire and wait for them to stop before emerging.
Once the guards stop coming, cross the floor over to the elevator, then check to see if any guards are around the corner. One might still be patrolling there, pop him, then go over to the underside edge of the platform above. Stand back away from the edge of the platform and look up, a guard might be standing up there, pop him, then call down the elevator. If any guards are above waiting just outside the elevator, run over to the crates opposite the elevator and keep moving backwards until you can see if any guards are above. Pop them from here, then head into the elevator. Ride it up, then head right.
Two guards will be across the metal bridge to the left of the elevator, stay on the far right of the elevator when you ride it up to avoid being seen. Take out the Tranquilizer (you got one from one of the technicians) and head into the large hangar at the end of the corridor. Stay on the right side of the door, then quickly fire a few shots into any part of the guard with his back to you to knock him out. Slowly edge around the left, if the guard ahead near the saucer spots you, hide and wait for him to appear, just don't shoot him with the Dragon as you'll attract the other guards' attention (not only the guards in the hangar, but the ones back in the crate room). Once he's close enough, pump him with a few shots from the Tranquilizer to knock him out.
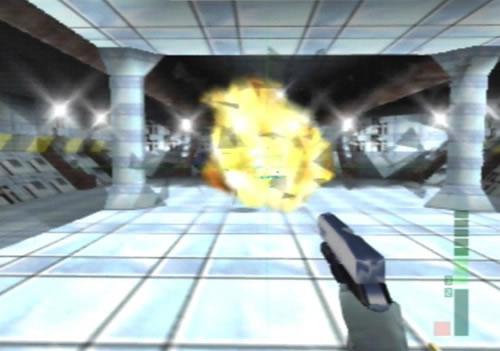
Keep an eye on the door you came through just to make sure that no guards have appeared, then take out the Dragon and move into the corner on the right so that you can see part of the Maian Saucer ahead. Drain one and a half clips into it to destroy the saucer to complete objective 2 (if you got the double LX from the guard in the cryo room earlier on, you can use the single bullet to destroy the saucer in one shot), just do it quickly so that the two guards near the saucer don't get a chance to catch you.
3. Activate distress signal
Once the saucer blows, two guards on the other side of the wall will get caught in the blast, but you must stay near the door at all costs and do not go into the hangar until the explosions stop, otherwise you'll be cooked almost instantly. Once the explosions die down, head up the ramp on the left and head around to the elevator in the corner. Two guards might still be up beyond the metal bridge, if the first one across the bridge spots you, quickly pop him, then finish off the second one in front of the elevator (one or both of the guards might be down from the explosion). Head over to the elevator and call it down. Ride it up to the next level, stand back from the door and zoom in on it, so that when the door opens you can quickly pop the guard straight ahead in the next room.
Take out the Tranquilizer and head through the two doors on the left. Carefully edge around the right corner until you can see one of the two guards' legs, then rip into him with the Tranquilizer to knock him out. The other guard beside him will probably charge at you, quickly shoot him to knock him out before he can fire. Head through the hallway to the next door, then go through the two doors to reach the final room with the comms radio. If you're low on Tranquilizer ammo, switch back to the Dragon, then quickly dash forward over to the first technician. Hide behind the brown wall partition so that the other technician can't see you, then quickly knock down the first technician before he hits you.
Sneak out from your hiding place, or just wait for the second technician to run over, then quickly knock him down. Using the Dragon, shoot out the wall partition on the left closest to the window, then take out the Tranquilizer. Knock down the first technician near the comms radio, then rush in and knock out the second who might still have his back to you. Activate the console on the wall to send the distress signal to complete the mission. Phew, this mission's a toughie, with such low health and ammo you'll have to practice dodging, aiming and disarming to conquer this one, just remember to preserve ammo and always consider disarming guards, and remember that the Tranquilizer can easily knock down any guard with about three shots, no matter where you hit them.
dataDyne Central - Defection
dataDyne Research - Investigation | dataDyne Central - Extraction
Carrington Villa - Hostage One | Chicago - Stealth | G5 Building - Reconnaissance
Area 51 - Infiltration | Area 51 - Rescue | Area 51 - Escape | Air Base - Espionage
Air Force One - Antiterrorism | Crash Site - Confrontation | Pelagic II - Exploration
Deep Sea - Nullify Threat | Carrington Institute - Defense | Attack Ship - Covert Assault
Skedar Ruins - Battle Shrine | Mr Blonde's Revenge | Maian SOS | WAR! | The Duel