


G5 Building - Reconnaissance
 There's two cloaked guards in this first room. |
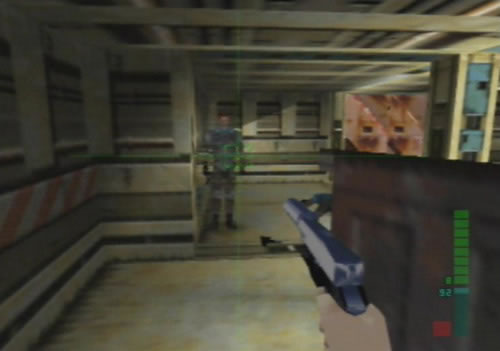 Catch them when they appear to fire at you. |
 Run around to avoid taking damage, and try taking lucky shots. |
 The second guard will drop this key card, use it to open the large door. |
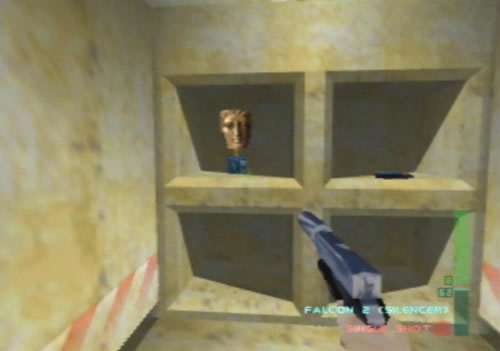
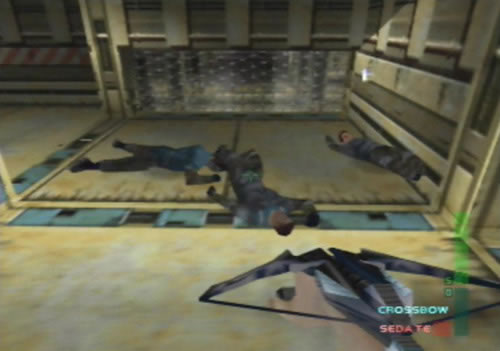 If you knock them out you'll score a Crossbow. |
 Knock this guy out from behind and activate the switch. |
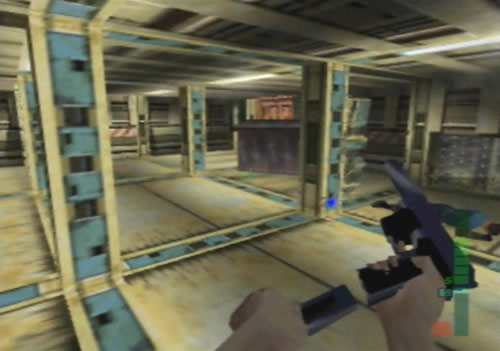
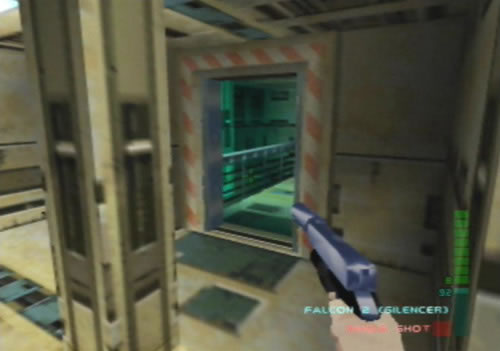
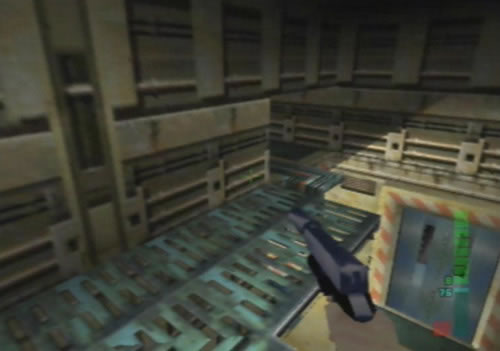
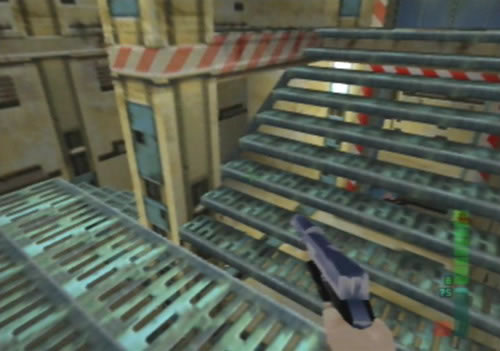
 The next room's lights are out, walk over past the glassed walls. |
 Four cloaked guards will appear, try to take them out quickly. |
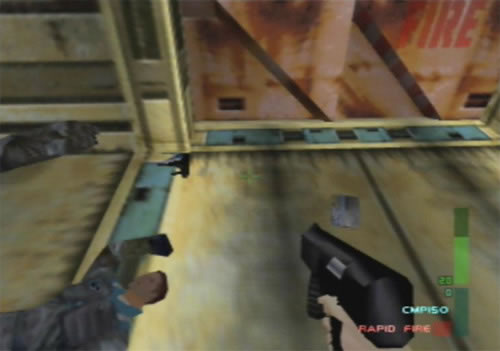
 Stand up against the door and shoot down the room as they run across. |
 Wait for this guy to turn his back then rush through and knock him out. |
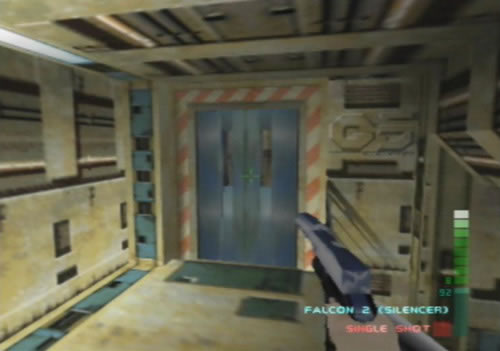 The room beyond this door contains more guards and an alarm, so watch out. |
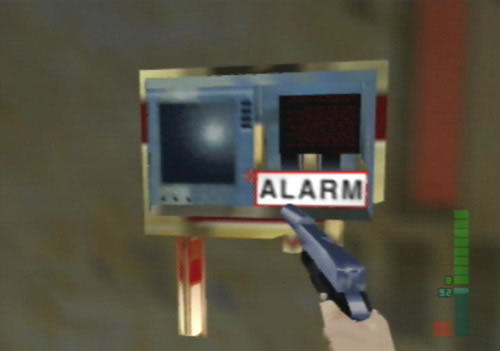 Knock the guards down before they trigger this alarm. |
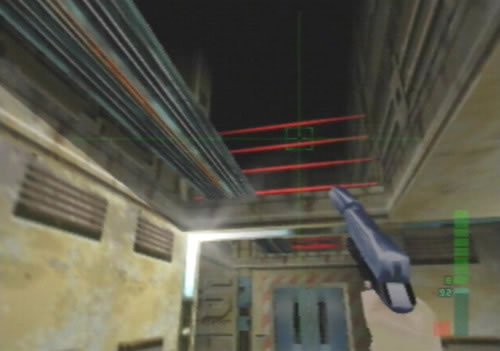 You'll need to deactivate these laser fields before going through. |
 The damping field generator's beyond this door. |
Agent
1. Holograph meeting conspirators
Once the mission begins two guards standing by the large door will dash forward and cloak. You won't be able to see them, so dash around the room and wait until they reappear. Once they appear, quickly find them and blast both before they can cloak again. Keep moving around so that they can't hit you when they appear. Once you knock down both guards the second one will drop a key card. Grab it and open the large door at the back of the room. Head around the corner and knock out the guard standing in front of the switch down the corridor. Activate the switch, then go through the door on your left. The next room will be larger than the previous, head over to the door in the corner on the right.
As soon as you pass the two glass windows the lights will come on in the room and several cloaked guards will attack. When the lights come on, switch to the CMP150 and dash back to the door you came through. Face the other end of the room and fire straight down when the guards tart moving. You should hopefully hit a few, they'll all dash across the room. Blast them all and grab the key card the last one drops. Open the small door in the corner and blast the guard behind it. Head up to the next door, open it and quickly blast the guard patrolling on your right before he sets off the alarm. Blast the two other guards hiding then head up the metal stairwell to the left of the door you came through.
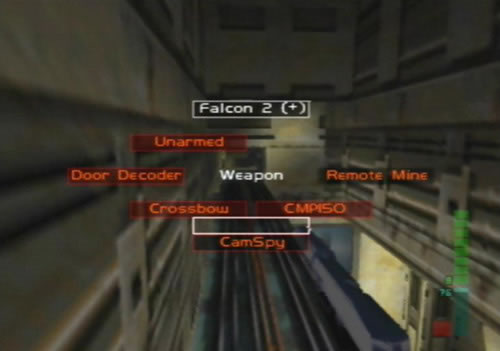
Walk around the catwalk, crouch down to get through the small openings, then make your way over to the opening above a locked door. Head through the opening, then turn left. You'll now be facing an opening in the wall which leads to the meeting room. You'll need to send the CamSpy through the hole to complete this objective.
2. Retrieve Dr. Caroll backup from safe
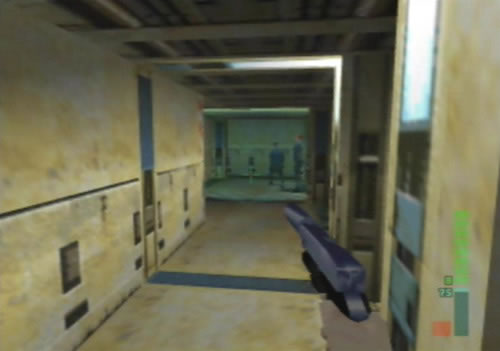
Now, there are two ways in which you can work this mission, the first is if you just send the CamSpy straight into the meeting room, watch the cutscene, and then proceed on with the mission, but you can also save time later by planting the CamSpy in front of the hole of the meeting room, then moving on. If you choose to move on, leave the CamSpy and turn around. You should see a guard standing by a door below. Pop him, then jump down. As you land, look to the right and you'll see another guard come out from in front of the locked door leading to the room with the laser defense system. Quickly knock him down before he can set the alarm off. Head through the door to the left of the alarm, and quickly knock down the guard patrolling the stairs.
Head up the stairwell and through the next door. Look right and blast the two guards down the hallway. Head down the corridor and blast any other guards around the corner on the left. Go through the door at the end of the hallway and you'll be in the safe room. On the wall on the right is the safe lock, that's where you'll need to plant the Door Decoder. Once you set the decoder into action, it'll take about 50 seconds before it unlocks the safe. During that time, an alarm will go off and guards with Magnums will keep appearing. If you haven't sent the CamSpy into the meeting room yet, once you set the decoder onto the lock, quickly switch to the CamSpy and send it into the meeting room.
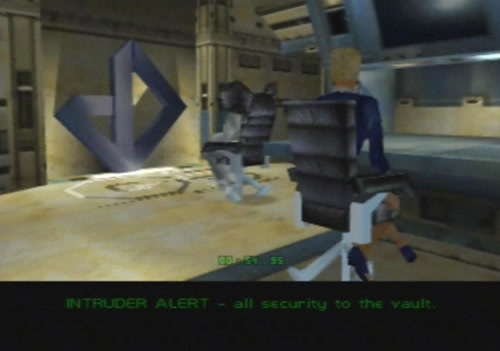
The cutscene will play, and you'll hear a voice alerting the guards and the alarm will go off, but the conspirators won't even notice! Wait for the timer to finish, then wait for the cutscene to end. Once it does, the safe door will be completely open, rush in and grab the disk on the shelf to complete this objective.
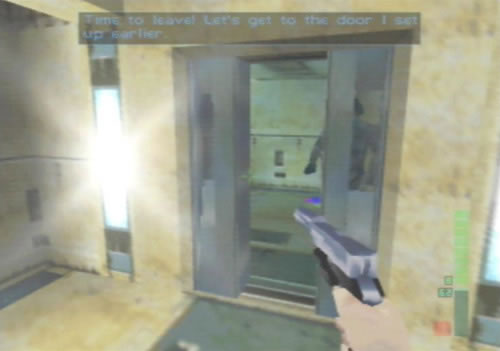
3. Exit building
Once you have the disk, you'll hear Carrington saying that your escape route is being made, you'll then hear an explosion. Back out in the hallway, head down the area leading off from the corridor. Straight ahead is one of the fire escape doors, if in the previous mission you planted the remote mine on the lower door, there'll be an opening in this wall. Head through to the outside fire escape to finish the mission. If you planted the mine on the upper door, head around beyond the lower door and up the stairwell. Blast any guards and head around to the opening to beat the mission.
Special Agent
1. Deactivate laser grid systems
In the first garage, rush over and grab the fallen guard's CMP150, then back up against the door. Keep moving around and wait for the guards to de-cloak. Once they do, quickly blast them (go for head shots) before they disappear again. Knock down both to get the key card. Head through the door and knock out the guard down the corridor. Hit the light switch and head through to the next garage. Take out the CMP150 and head through the glass opening on the right. The lights will come on and four cloaked guards will appear. Head back to the door and face the other end of the room.
As the guards run across, start firing to blast a few of them. Finish off any others and grab the key card. Head through the next room and knock down the guard there. Before going into the laser defense room, wait for the guard to pass by the door, then quickly rush in and knock him out from behind. Get rid of the remaining two guards in here, then start de-activating the small control switches on the walls - just make sure you don't hit the alarm by accident. Once you turn off all the switches the laser system will shut down and you'll have completed objective 1.
2. Holograph meeting conspirators
Head up the stairwell and through the small openings along the catwalk. Once you reach the next room beyond the locked door, launch the CamSpy and leave it front of the opening leading to the meeting room. Turn around and blast the guard down by the door. Jump down and finish off the other guard to your right. Head through the door and make your way up to the safe room. Once there, plant the decoder on the lock then quickly switch to the CamSpy and send it into the meeting room to complete objective 2.
3. Retrieve Dr. Caroll backup from safe
Wait for the cutscene to end, once it does, press Start and switch to the Remote Mine. Head into the safe and grab the disk to complete objective 3.
4. Exit building
With that done, detonate the mine you planted in the previous mission, then head over to the opening and out onto the stairwell to complete the mission. Keep in mind that depending on which door you planted the mine on, if it was the lower door you'll just have to dash out of the safe room and through the opening, if it was the upper door you'll have to make your way to the upper level to reach it.
Perfect Agent
1. Disable damping field generator
The first part of this mission will be the toughest, try to knock down the first two cloaked guards quickly, but if you take too much damage, restart the mission. Remember to always go for head shots. Once they're down, head down the next corridor and knock out the guard in front on the switch. Activate the switch, then head into the next room. Take out the CMP150, head through the glass, then quickly rush back to the door. Try to blast as many of the four guards here as possible when they run across, if you have to, use the dumpster in the corner for cover.
Once you've got the key card the rest of the mission will be easier. Knock out the guard in the next room then head up to the next door. Wait for the patrolling guard to pass, then head through and knock him out. Blast the other two guards in here, then head over to the door to the right of the alarm. Head through and blast the guard on the stairs. Head down the stairs and into the small room. You should see the damping field generator straight ahead, but make sure that you don't shoot it or the mainframes near it, otherwise it'll blow and you'll fail the mission.
Three guards will be hiding in the room, carefully edge around the corner and take aim before they hit you. The last guard will be hiding behind the pillar right in front of the generator, try to hit him before he moves. Once they're gone turn off the generator to complete objective 1.
2. Deactivate laser grid systems
Head back up to the laser defense room, then de-activate all of the switches (except the alarm) to shut down the defense system and complete objective 2.
3. Holograph meeting conspirators
Head over to the stairwell and make your way over the catwalks to the next room. Plant the CamSpy in front of the hole leading to the meeting room, then turn around and blast the guard below. Jump down off the catwalk and knock down the other guard to your right. Head through the next door and proceed up to the safe room. Once there, plant the decoder on the lock then quickly switch to the CamSpy and send it into the meeting room to complete objective 3.
4. Retrieve Dr. Caroll backup from safe
Once the cutscene ends, switch to the Remote Mine and head into the safe. Grab the disk to complete objective 4.
5. Exit building
This time it really helps if you planted the mine on the lower door in the previous mission. Detonate the mine then rush out of the safe room, ignore the guards and dash out of the opening to finish the mission. If the mine was on the upper door, take out the CMP150 and blast any guards on your way up to it. This mission shouldn't be as tough as previous ones, just mainly the early areas with the cloaked guards.
 Take this room carefully, three guards hide behind wall sections. |
 Clear the room and activate the console to shut down the generator. |
 Climb up the stairs in the laser field room and crawl through. |
 At this point activate the CamSpy and leave it at this small hole. |
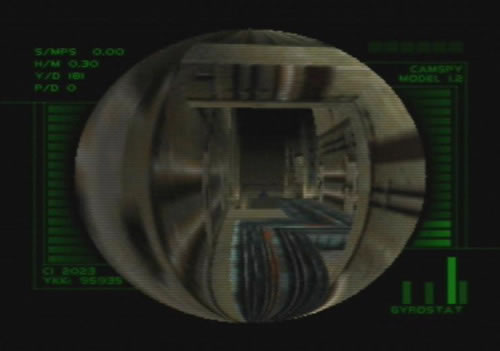 Don't take it inside the conspirator's meeting room just yet. |
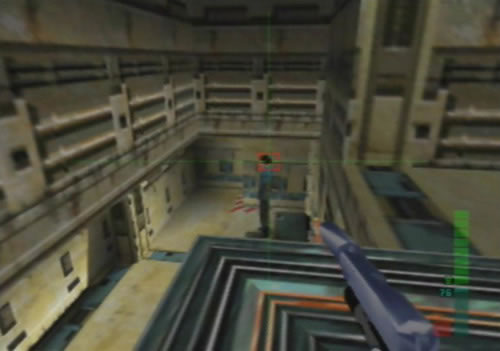 Turn around and quickly take down the guards in this room. |
 Clear the enemies and climb up this stairwell. |
 Watch out for more guards waiting ahead. |
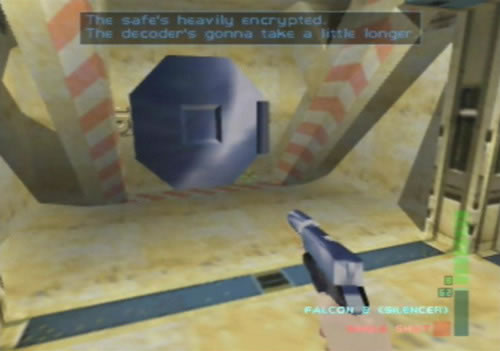 You'll find the safe in this large room, the keypad's on the right. |
 Plant the Decoder on the keypad then activate the CamSpy quickly. |
 If done right you'll watch the cutscene as the Decoder's timer counts down. |
 Wait for the safe door to open, then dash inside and grab the disk. |
 You'll have an army of Magnum-weilders camping outside. |
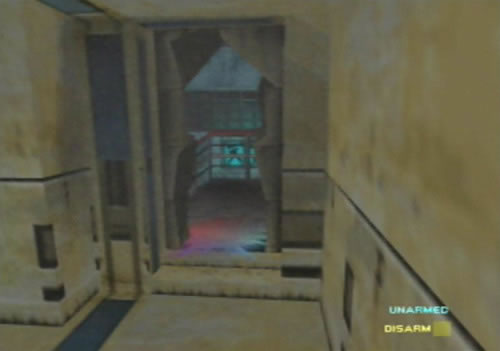 Detonate the Remote Mine and dash out the hole it creates. |
 Joanna sends her recorded data of the conspirator's meeting. |
Next Mission: Area 51 - Infiltration
dataDyne Central - Defection
dataDyne Research - Investigation | dataDyne Central - Extraction
Carrington Villa - Hostage One | Chicago - Stealth | G5 Building - Reconnaissance
Area 51 - Infiltration | Area 51 - Rescue | Area 51 - Escape | Air Base - Espionage
Air Force One - Antiterrorism | Crash Site - Confrontation | Pelagic II - Exploration
Deep Sea - Nullify Threat | Carrington Institute - Defense | Attack Ship - Covert Assault
Skedar Ruins - Battle Shrine | Mr Blonde's Revenge | Maian SOS | WAR! | The Duel