


Area 51 - Rescue
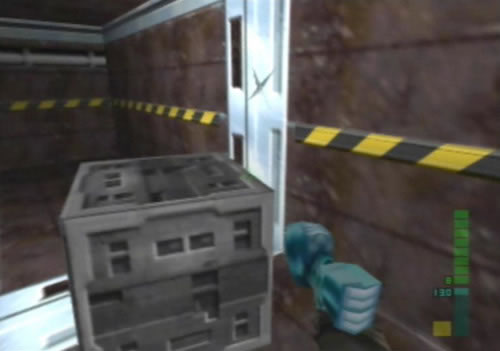
 Leave the crate here while you clear out the guards ahead. |
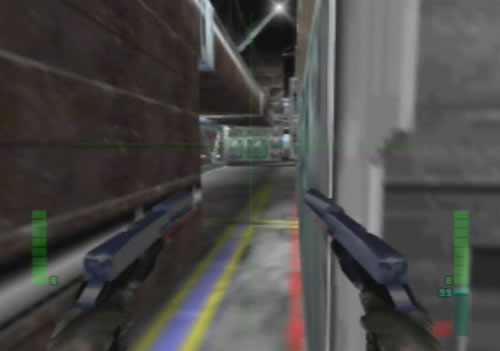
 There's a bunch of guards patrolling around this warehouse-like area. |
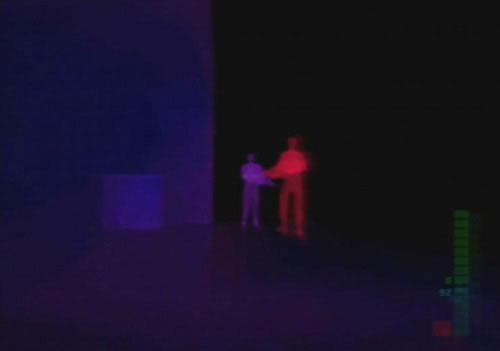 Use the X-Ray Scanner to see the guards patrolling around. |
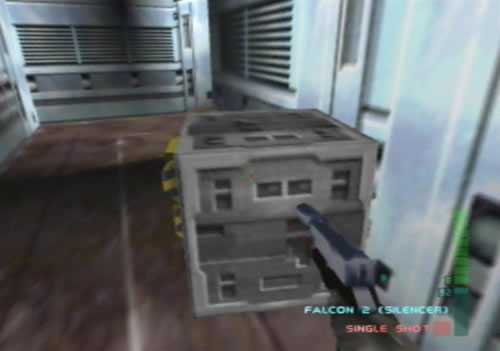
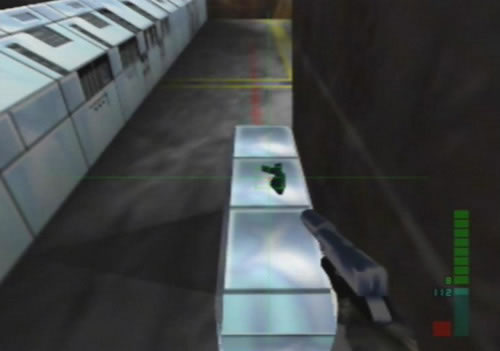
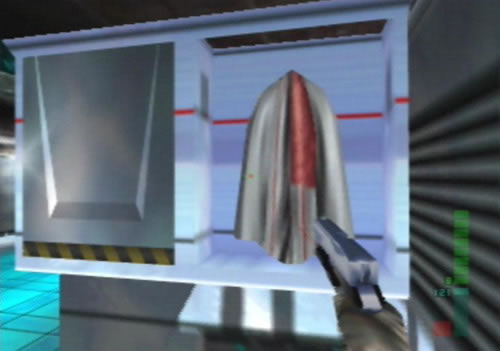
 Destroy this small crate to reveal a second Falcon 2 inside. |
 Keep your eyes open for guards everywhere. |
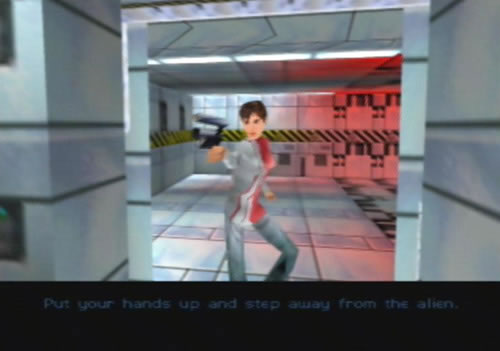
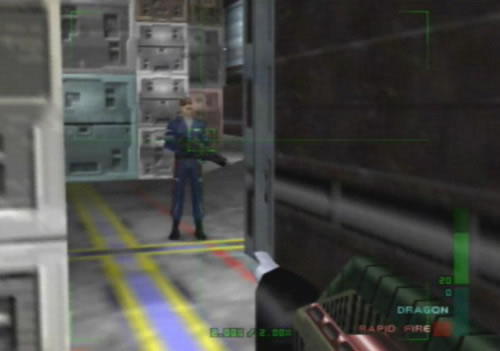 If one spots you they'll raise the alarm, so take cover. |
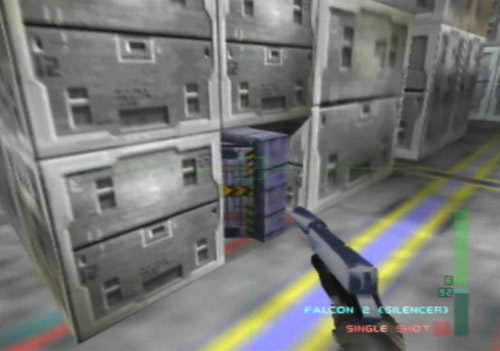
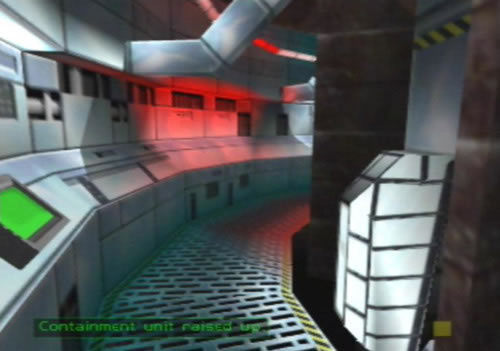
 More guards hide around the corner of the cargo lift. |
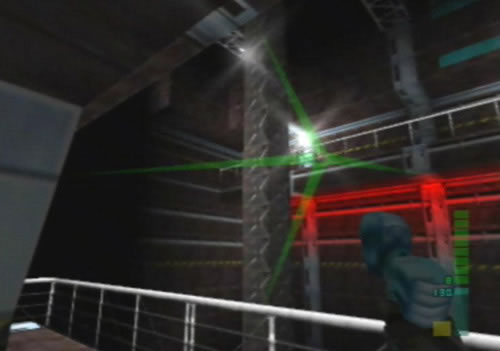
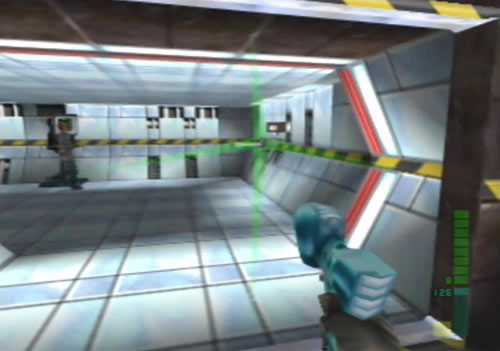
 If the guards up on the walkways spot you use the X-Ray Scanner to see them. |
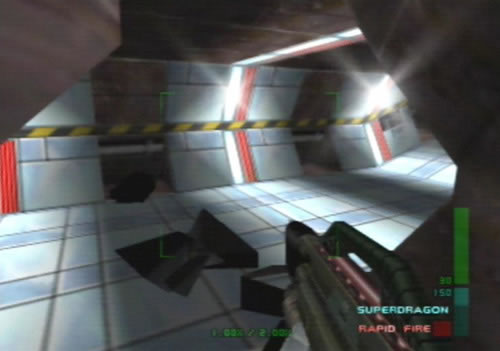
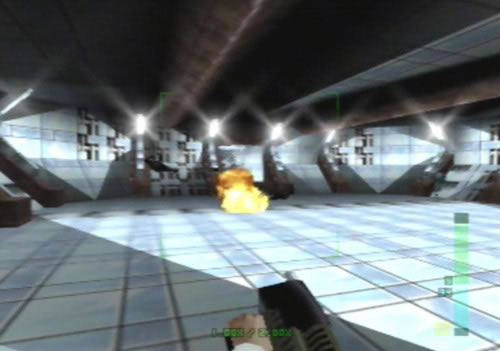
 Take the guards out from afar with the Dragon before riding up the lift. |
 If the technician from the previous mission survived he'll open this door for you. Pump a few shots into the door to get his attention. |
 Up above the hangar you'll find a Phoenix waiting. |
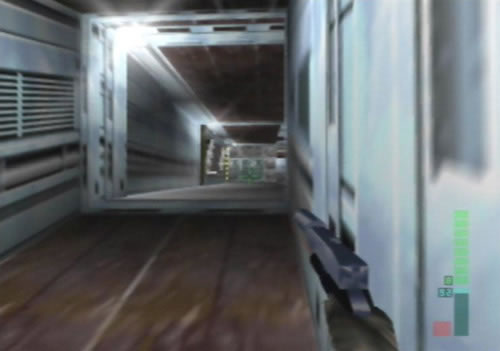
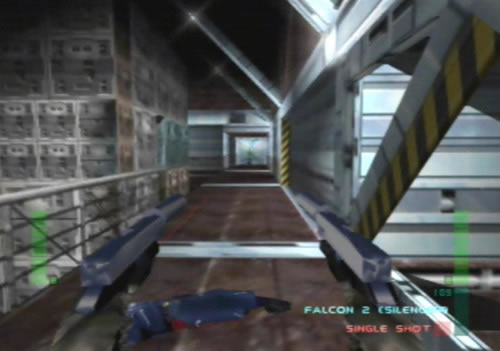
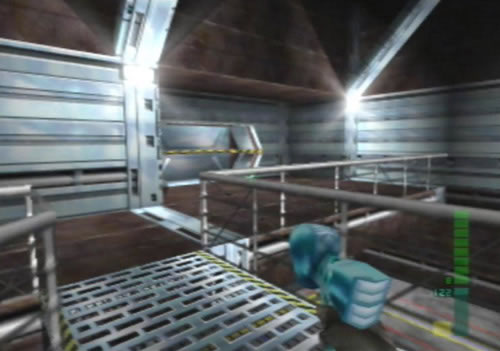 Cross the bridge in the warehouse room to this door ahead. |
 Use an Explosive Shell to knock down all these guards around the lift. |
 The weak wall section Jonathan marked is way up there. |
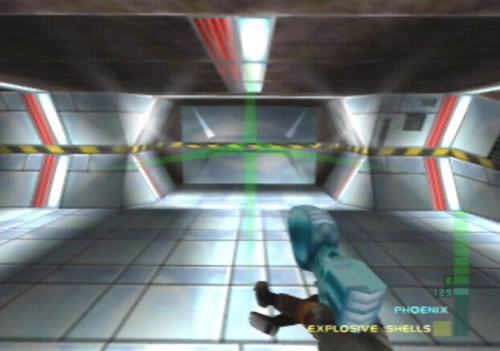
 Shoot the crate from afar as it rests in front of the X (Explosive Shells also work). |
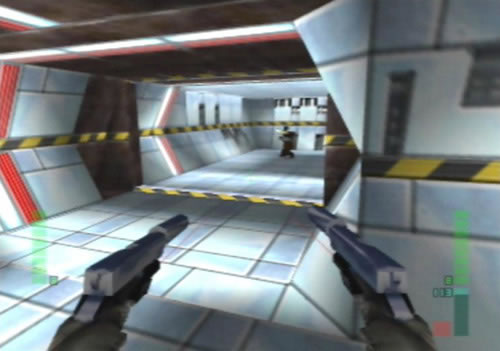
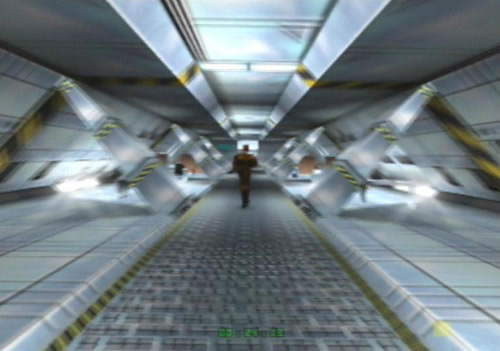
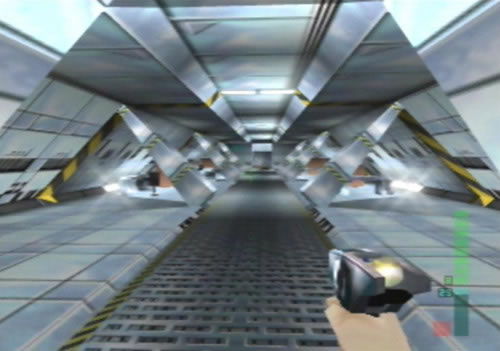
 Watch out for SuperDragon-weilding guards in the hallway beyond. |
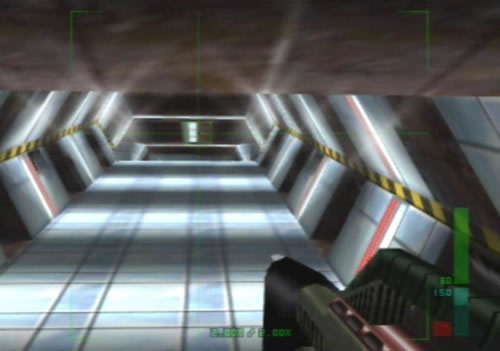 There's a guard posted at the top of this sloping hallway. |
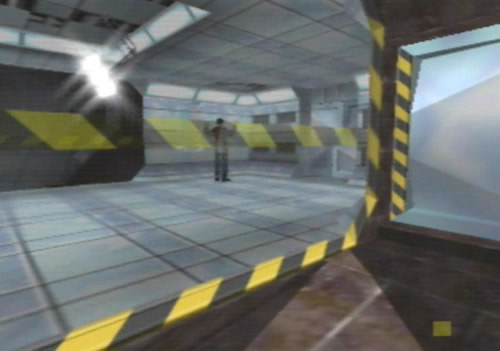
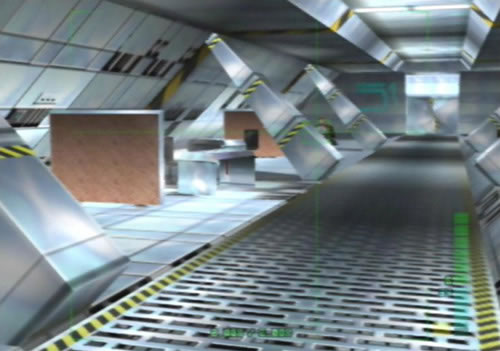
 The records you need to destroy are beyond this locked door. |
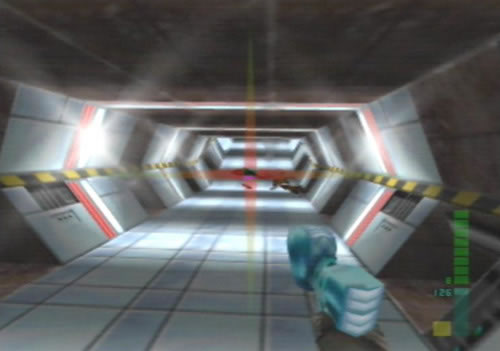 Use Explosive Shells to win against these guards with ease. |
 Quickly destroy the turret in this room before it's activated. |
 That terminal on the right controls the door lock systems. |
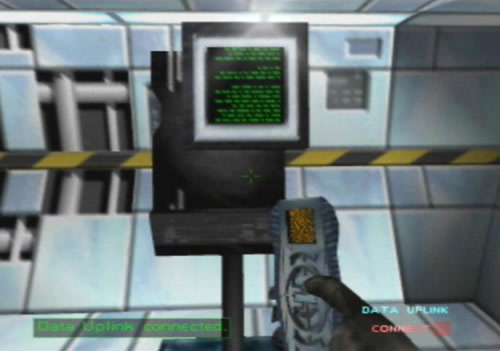 Hack the terminal and the doors will go haywire. |
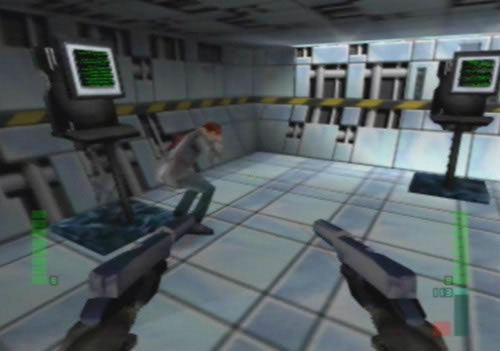
 Two guards hide out in the computer record's room. |
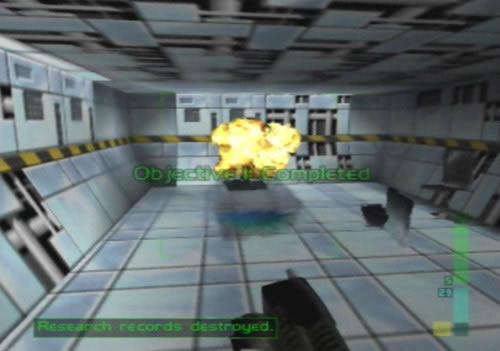 Pump a Grenade from the SuperDragon into the terminal to wipe the records. |
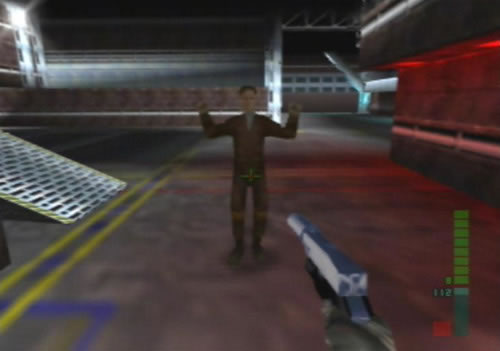
 Shoot away at the showers door to get the guard's attention. |
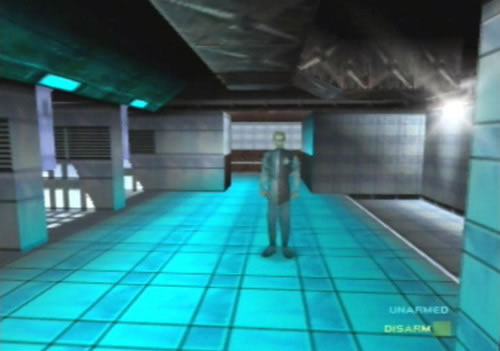
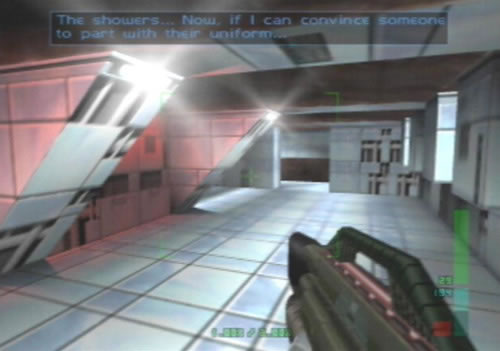 Ambush the guard as he opens the door and sneak inside. |
Agent
1. Obtain and use lab technician Disguise
Once the mission begins, leave the crate alone for now and head around to corner ahead of you. Go up the ramp and wait near the top. If a guard across the large room spots you, just blast him before he gets too close. Use the X-Ray Scan to look through the wall on your right so that you can see the guard patrolling around. Once he walks down between the crates away from you, rush out and knock him out. Head around to the back of the crates and to the right past the small purple barrel. A guard will be right around the corner, knock him out, then shoot the barrel until it explodes, revealing a second Falcon 2 silencer. Grab it and head around to the large elevator. Try to not attract any attention, if any guards appear just blast them before they fire.
Use the X-Ray Scan to check if any guards are up next to the elevator above you, if there are wait until they run into the elevator and come down before moving on. Once they're gone, go up the elevator to the next level and blast the two guards across the metal bridge. Once the two guards are gone, go back and grab the crate from the start, then bring it back up across the metal bridge. Go through the two doors into the room with the catwalks leading around to the weakened wall. Four guards will be patrolling around above, try to shoot some with the Dragon before they head around to the elevator. Head into the elevator on the left then park the crate to one side, as you'll need to blast the guards quickly as you go up to the next level before they cause too much damage.
Once all four guards are gone, grab the crate and head out onto the catwalk. Comb the walls on the opposite wall to the elevator and you should find a small X engraved on the wall. Park the crate next to it, then back up and shoot the crate with the Dragon until it explodes. An opening will appear in the wall and you'll hear someone get hit from the explosion on the other side. Rush through, then grab the lab uniform on the ground that was dropped by the technician to complete objective 1.
2. Gain access to autopsy lab
Once you have the lab uniform, a timer will appear so you'll have to get a move on. Quickly press Start and select it from your inventory or select it from the Quick Menu. Once it's activate switch to Unarmed. Head down the corridor to the left of the opening in the wall and you should see a large door on the right wall. Open it and head into the large room. Head down to the other end and knock out both guards patrolling, to save you some trouble when coming back.
Once at the other end of the room, open the door there and walk up to the next one. A guard will speak to you from the other side, and will eventually let you in to the Autopsy lab. Once he opens the door, knock him out, then head over to the technician on the right. Knock him out then go up to the door ahead of you. Head in and around to the glassed-off area, then knock out the lone technician inside to receive a key card and to complete objective 2.
3. Rescue the crash survivor
Once you get the key card the disguise won't help anymore so whip out the SuperDragon (you should have found one from one of the guards) then head back out the entrance of the lab. Two bio-technicians and several guards will appear, so use the grenade launcher to easily blast them all. Once they're gone head back out to the main hallway where you blew the hole in the wall. Once you reach the corridor, head right. Go through the door and you should see another door on the right wall. Head in, then down to the other end of the room. About three guards and a bio-technician will be hiding here, use grenades to easily get rid of them.
Head through the door at the end into the lab area, once you head in a timer will appear and you'll only have a few seconds to get to Elvis. Three guards and another bio-technician will be in here, blast all of them with grenades and the last one will drop a key card. Grab it and head into the glassed-off area to complete the mission.
Special Agent
2. Obtain and use lab technician Disguise
There are several guards around the cryo room area, so this guide will direct you to get the lab disguise first. You can use one of three methods to blow open the wall Jonathan marked with an X, the explosive crate, a proximity Dragon or the Phoenix. We'll be using the Phoenix here (if you want a faster completion time for the mission use the proximity Dragon and shoot it with the Falcon 2), the Phoenix will also help you out further in the base. Head around the corner and up the ramp, then wait there. If a guard sees you from afar, blast him, them switch on the X-Ray Scan and watch the guard through the wall on the right. Once he walks away from you, rush over and knock him out, then go around and knock out the other guard near the explosive barrel.
Shoot the barrel and grab the second silenced Falcon 2, then head forward and blast the guard patrolling around the crates. Go over to the elevator and call it down, try not to attract any more attention, take cover if more guards appear before firing at them. Head up to the next level, then quickly blast the guard around the corner of the elevator. Head to the right of the elevator and down the long path, quickly blast the guard standing up against the door at the far end, then go up to the door. It'll be locked, the only way to open it is if you didn't kill the technician in the previous mission (so only knock him out). Start firing at the top and sides of the door and he'll eventually open it from the other side. Head into the hangar and go up the ramp on the left.
Go around to the elevator and call it down. Head in and you'll go up the shaft instead of down. Go through into the room above the hangar lifts, the Phoenix is sitting on a small table near the windows. Grab it and head back down to the room with the crates. Go across the metal bridge past the elevator and switch to explosive shells. Blast the two guards on the other side and head through the door. Try to pick off two of the guards up on the catwalk opposite you, then switch on the X-Ray Scan and look up. You should be able to the see the other two guards in front of the elevator, fire a shot at them from below and the explosion might knock them down, if it doesn't climb in the elevator and blast the door as you go up to hit them.
Head around the catwalk, then just fire a shell into the wall to blow it open. Head into the lab area, then go up the long ramp on the right. Blast the guard at the top of the ramp, then head down the ramp on the right. Halfway down you'll spot two doors opposite each other with guards in front of each, fire near them on the ground to knock them down. Head right down to the bottom until you reach a large door ahead and two small doors either side of each other. Go through one of the small doors and you'l be in the locker area. Blast the guard patrolling, then head over to the shower area. Inside is the lab technician carrying the disguise, quickly knock him out before he can escape. Grab the lab uniform he drops to complete objective 2.
1. Locate conspiracy evidence
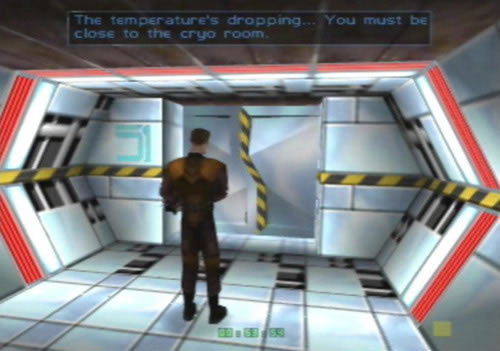
Before you can reach the autopsy lab, you'll need to find the alien remains in the cryo room. Put on the lab uniform and switch to Unarmed. You'll have to be quick now as the timer will appear. Head back out of the shower and locker area and go back up the long ramp. Keep going past the wall you blew open earlier, and keep going down the hallway until you see a large brown door ahead with large doors on the left and right. Go through the right door, then into the circular cryo room. Don't worry about the guards, they'll just greet you as you go past.
Once inside the cryo room, go around the left and activate the first switch you come up to. Turn around and face the pod that has risen up, then switch on the X-Ray Scan. You should just be able to see the alien inside the pod, wait for the scanner to finish checking it, once it says Objective 1 Completed, switch of the X-Ray Scan and head back out into the long hallway.
3. Gain access to autopsy lab
Go past the first door on the left, then enter the second one to reach the long room leading to the autopsy lab. Head down the room and knock out the two patrolling guards, then head in to the lab, wait for the guard to let you in, then knock him out and enter the room. Rush over to the inner lab entrance, knock out the technician, enter the lab and knock out the second technician to get the key card leading to the lab where Elvis is and to complete objective 3.
4. Rescue the crash survivor
Head back out of the inner lab and take out the SuperDragon. Switch to grenade launcher and fire at the main door when the guards rush in. Once they're down, switch back to the Phoenix and head back out to the main hallway. Go right and into the next door on the right. Head down the long room leading to Elvis' lab, blast the guards hiding behind the pillars, then rush into the lab. The timer will appear, quickly blast each of the four guards in the corners of the room with explosive shells, then grab the key card the last one drops and enter the inner lab to complete the mission.
Perfect Agent
1. Destroy computer records
Another tough mission, you'll need to destroy computer records of the Maian Saucers' crash as well as the other objectives this time. Once you begin, head forward then go up the ramp, stop halfway and switch on the X-Ray Scan. Look through the wall on the right, you should spot a guard patrolling around. Wait for him to walk through the gap between the crates away from you, then switch off the X-Ray Scan, switch to pistol-whip and charge out. Quickly walk up behind the guard and knock him out. Head forward to the end of the gap in the crates, then go right and just around the corner ahead is another guard with his back to you. Knock him out quickly, then stand back and destroy the small barrel hiding under the crates to reveal a second Falcon 2 silencer.
Crouch down and crawl into the small hole to get it. A guard will be patrolling around the crates to the right of the barrel, if he spots you, hide behind the crates and wait for him to get closer. Lean out and pop him quickly before he can hit you. Grab the Dragons each guard drops, then take it out and go back to where the guard was standing near the barrel. Head forward and around the corner so that you can see the elevator ahead. Three guards will be patrolling around, crouch right down, then zoom in and try to pop each with a head shot. Once to knock one down, the other two will probably charge out at you, quickly pop them in the head before they get to close, if they do, hide when they fire, then once they begin reloading, zip out and finish them off.
Grab the Dragons they drop, then head around to the side of the elevator. Walk right over to the corner ahead beyond the crates, then turn around and look up at the platform above. If the guard's there, crouch down, zoom in and pop him in the head. If he ran over to the elevator, stand beside it and use the X-Ray Scan to see if he's in the elevator. Wait until he comes down, then quickly pop him when he comes around the corner. Check above the elevator to make sure that no guards are up there, then head in and ride it up. Stay on the far right of the elevator up against the door so that the two guards beyond the metal bridge can't see you, then exit the elevator, turn right and crouch right down.
Zoom in and pop the guard standing in front of the door ahead, then run up to it and wait for the technician to open it (make sure that you don't kill him in the previous mission, if you have, replay Infiltration on Agent and only knock him out). Once he opens the door, head into the hangar and go up the ramp on the left. Head around to the elevator in the corner of the room, then ride it up to find the Phoenix in the room above the hangar lifts. Once you have it, take it out and head back down to the elevator in the crate room. Slowly edge around over to the bridge so that the two guards ahead are in view, then fire near their feet on the ground with an explosive shell to knock them both down. If they charge, just shoot near them on the ground to knock them down easily.
Head over the bridge and through the next two doors. Rush up to the railing in the next room, then look up at the balcony on the opposite wall. Three of the four guards above will spot you from there, quickly pound the wall behind them with shells to knock them all down. Switch on the X-Ray Scan and look up at the elevator on the left. The fourth guard will be at the elevator's door, if he's still standing up there, try to fire a shell into the roof to hit him, if it doesn't work, jump in the elevator and fire at the door as you rise to blow him down. Ride up the elevator and head over to the weakened wall. Fire a single shell at it to blow the wall open.
Head into the corridor and look left. If the patrolling guard spots you, quickly fire a shell at him, then head up the sloping corridor on the right. Once at the top, two guards will spot you, make sure you knock both down with explosive shells. The door ahead contains the console with the computer records, but the door will be locked so you'll have to upload a virus into the system to overload the doors. Head down the sloping corridor on the right, then stop as you near the two doors facing each other halfway down.
Aim at the ground near one of the doors and fire a shot to knock down one of the guards, then quickly knock down the second one as he'll run out from his post. Once both are down, take out the Dragon and go over to the door on the right. Open it, then quickly aim at the gun turret on the right wall inside the room. Fire into it, hopefully you should destroy it before it shoots at you, but the door might close before you destroy it, this can benefit you as it'll protect you from the turret's shots. Destroy the turret, then head into the room and take out the Data Uplink.
Ignore the two technicians, then walk up to the console on the back wall opposite the turret's remains. Press B to hack into the terminal, then once the Uplink's finished, the doors in this area will go crazy and will sporadically open and close. Take out the Phoenix and head back out to the corridor. Head up the sloping hallway on the left, then stand at the door on the right at the top. Inside, two guards and a technician will spot you, the technician will run off, hide and wait for the two guards to emerge, then quickly pound them with explosive shells to knock them down easily. Be careful now, as a blue guard will appear and come up the ramp opposite the door, wait for him there and make sure you knock him down. Head into the room where the two guards were and destroy the console on the wall to destroy the records to complete objective 1.
3. Obtain and use lab technician Disguise
Leave the room and head down the sloping corridor on the left. Go right down to the bottom, but don't open the door to the hangar. Instead of going through the hangar to reach the showers, look at one of the doors on the left and right of the hangar door and fire several shots from the Dragon (or SuperDragon) into it. The guards behind the two doors might hear you and open the door. Once one of them opens a door, charge in and blast them, if the second guard also heard you and opened the other door, quickly pound him with the Phoenix. Switch to Unarmed and head into the shower area.
Quickly knock out the technician standing there, then switch on the X-Ray Scan and look at the locker doors on the left wall. You should be able to spot the uniform in one of the lockers (it's location is random), once you find it, switch off the X-Ray Scan, open the locker and grab the uniform. Activate it from your inventory to complete objective 3.
2. Locate conspiracy evidence
You'll now have 1:30 to reach the autopsy lab, but first you must find the remains of one of the Maians in the cryo room. Quickly leave the showers and head back out to the main corridor. Head back up the sloping corridor and go back to the corridor where you blew the hole open in the wall. Keep going through the doors, if the patrolling guard is still there, knock him out from behind, then head forward over to the cryo rooms. Go into the one on the right, enter the room and go over to the first switch on the left wall. Activate the switch to bring the container up, then turn around and switch on the X-Ray Scan. Look up at the Maian inside the container, once you've finished scanning it objective 2 will be complete.
4. Gain access to autopsy lab
Leave the cryo room (say hi to the bio-technician and guards here), then head back toward the hole in the wall of the main corridor. Pass the first door on the left wall, then enter the second one. Two guards will be patrolling up and down the hallway, get behind each and knock them out before moving on. Once both are down, head over to the lab door, then enter and wait for the guard to open the door. Once he opens the door, the timer will disappear. Knock him out and head over to the door leading to the glassed-off lab. Knock out the technician standing by the white board, then enter the lab and knock out the second technician inside to get his key card to complete objective 4.
5. Rescue the crash survivor
Now that the disguise has no effect anymore, take out the SuperDragon and head back out of the lab. Two bio-technicians and several guards will come through the door leading out to the hallway, stand back and fire a grenade over at the door to knock them all down. Take out the Phoenix and head back out to the hallway. More guards will be hiding behind the brown wall partitions ahead, fire an explosive shell into each to knock them down, if any charge out fire at the ground near them to knock them off their feet ahead. Once all the guards are down, head back out to the main corridor and head right.
Go through the next door on the right wall, then head into the next hallway. Two guards will be hiding behind the second set of diagonal pillars ahead, fire explosive shots into the pillars to knock them down. A third guard and a bio-technician will be hiding behind the furthest wall partitions, quickly knock them both down before they hit you. Head over to the lab door and enter it. Once you head into the lab, you'll only have a few seconds to reach the glassed-off lab to save Elvis, three guards and a bio-technician will be in the outer lab in each corner of the room. Dash around to dodge their fire and pound explosive shells at them, try to hit the walls and floor near each to knock them down, then once you blow them all down the last one you blow down will drop a key card.
Grab it then quickly head into the glassed-off lab to complete the mission. Yet another toughie, this mission shouldn't be as hard as the previous, having the Phoenix will make it a hell of a lot easier, but you'll still need to be aware of your surroundings to make it through in one piece.
 On Agent & Special Agent this technician holds the lab disguise. |
 But on Perfect Agent you'll find it in one of the lockers. |
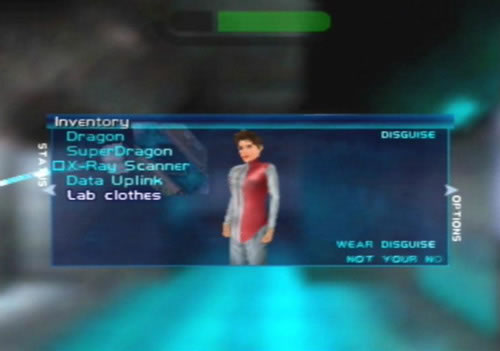 Use the Pause Menu to put on the disguise. |
 Switch to Unarmed and tear back down the corridors to the hole. |
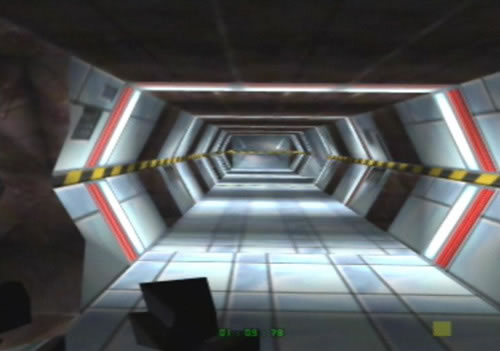
 Keep going down the corridor and head right at the end. |
 Call up the first unit on the left in here and switch on the X-Ray Scan. |
 Quickly travel down this corridor and knock out both guards. |
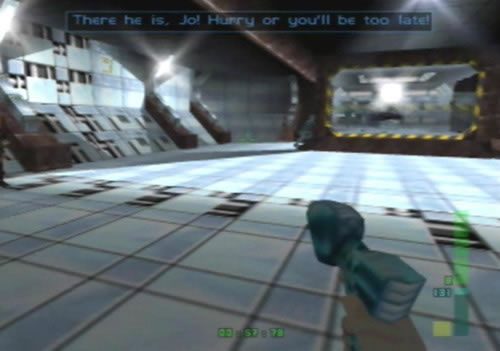
 Once this guard opens the door the timer will vanish. |
 Knock this technician out, he has a key card. |
 Now you can access the lab where Elvis is held. |
 Use a SuperDragon grenade to strike down the ambushing guards. |
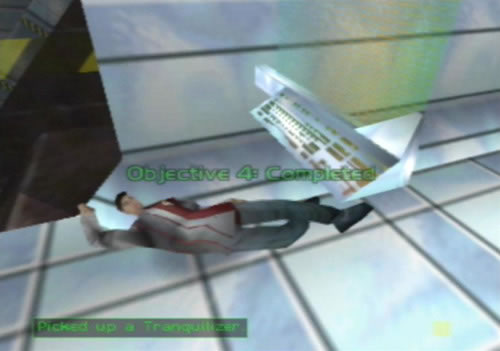
 The Tranquilizer comes in handy for taking down guards quickly. |
 More guards hide out in the corridor leading to Elvis. |
 Once inside quickly use the Phoenix to knock down the four guards. |
 Grab the key card one guard drops and save Elvis from dissection. |
Next Mission: Area 51 - Escape
dataDyne Central - Defection
dataDyne Research - Investigation | dataDyne Central - Extraction
Carrington Villa - Hostage One | Chicago - Stealth | G5 Building - Reconnaissance
Area 51 - Infiltration | Area 51 - Rescue | Area 51 - Escape | Air Base - Espionage
Air Force One - Antiterrorism | Crash Site - Confrontation | Pelagic II - Exploration
Deep Sea - Nullify Threat | Carrington Institute - Defense | Attack Ship - Covert Assault
Skedar Ruins - Battle Shrine | Mr Blonde's Revenge | Maian SOS | WAR! | The Duel