


Weapons Overview
With an excess of 20 weapons to choose from, you'll always have the right firepower for the job. Read about how and when to utilise the weapons here.
| · Falcon | · UGL Liberator | · Jackal | · Hawk |
| · P9P | · RCP-90 | · Plasma Rifle | · Frag Grenade |
| · MagSec 4 | · Laptop | · Shockwave Rifle | · Flashbang |
| · DY357 | · FAC-16 | · Rocket Launcher | · Flashbang |
| · Psychosis Gun | · KSI-74 | · DEF-12 Shotgun | · Multi-Mine |
| · CMP-150 | · SuperDragon | · Combat Shield | · Unarmed |
| · DW-P5 | · M60 | · Viblade | · Turret |
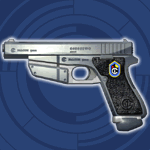
Pistols
| Falcon | ||||||||||||||||||||
|---|---|---|---|---|---|---|---|---|---|---|---|---|---|---|---|---|---|---|---|---|
Primary: With a solid clip for a simple pistol, the Falcon's manual fire should serve you well in close quarters. Use it in tandem with the Cover Move against advancing enemies when they're about to overrun your position. Try to score headshots for maximum damage, otherwise you'll find yourself wasting clips on few enemies. With its manual fire rate, you'll need to practice your aim to avoid wasting shots. Secondary (Firecracker): The Firecracker throws down a self-discharging clip on the ground used to distract enemies. Use the resulting distraction to sneak by enemy positions or shred their ranks from behind. Try throwing a clip near enemies standing still, if you're lucky some of the shots fired might sting them. |
||||||||||||||||||||


| P9P | ||||||||||||||||||||
|---|---|---|---|---|---|---|---|---|---|---|---|---|---|---|---|---|---|---|---|---|
Primary: The P9P's relatively small clip doesn't present much stopping power against multiple enemies, so pick your shots carefully. Aim for headshots and don't be tempted to unload too many shots into one target. Use the scope to pick off enemies from afar or assess your surroundings to avoid an ambush. Don't forget that while dual-wielding P9Ps you can't zoom in as the Left Trigger fires the second gun. Secondary (Add silencer): Break out the P9P's silencer for stealth kills when you don't want the entire world hearing your activities. Tertiary (Add flashlight): Switch the gun's flashlight on when stumbling through dark areas. Don't flash the light around enemies though as they're not stupid enough to not notice the beam. |
||||||||||||||||||||
| MagSec 4 | ||||||||||||||||||||
|---|---|---|---|---|---|---|---|---|---|---|---|---|---|---|---|---|---|---|---|---|
Primary: Like the Falcon, the MagSec's small clip size doesn't present much in a heated firefight, so use this from cover and aim for the head. When stealth isn't the best course of action use this alongside an SMG or Rifle, as the range can pay off against unsuspecting distant enemies. Dual-wield MagSecs when assaulting enemies up close for a devastating effect. Secondary (Rebound fire): A secondary shot from the MagSec fires a magnetised round capable of bouncing off solid surfaces. Use it against foes in cramped corridors, as the shot is mostly innacurate and difficult to aim with precision. |
||||||||||||||||||||
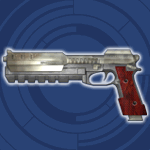
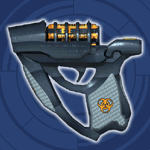
| DY357 Magnum | ||||||||||||||||||||
|---|---|---|---|---|---|---|---|---|---|---|---|---|---|---|---|---|---|---|---|---|
Primary: This classic firearm still boasts the strongest stopping power of all pistols, you'll find that a single shot on average is all it'll take to down an opponent or shatter their armor. Keep your aim true as the refire rate isn't as fast as other pistols and can leave you open to attack from SMGs or Rifles. Pull the trigger rapidly for a quick release of shots or you'll experience a slight delay between each round. Keep in mind that this beast can fire shots clear through solid doors, even through thick steel blast doors at that. Secondary (Decoy fire): The Magnum's secondary fire releases a silenced bullet which explodes after a short time in the air or once it strikes an object. Use it to distract enemies from afar with an audio diversion before moving in. |
||||||||||||||||||||
| Psychosis Gun | ||||||||||||||||||||
|---|---|---|---|---|---|---|---|---|---|---|---|---|---|---|---|---|---|---|---|---|
Primary: Score a single shot against an opponent to heavily disorient their aim. The affect against human players causes their screen to blur and smear out of focus. Score more shots to increase the blurring factor. Just don't be trigger-happy as you'll eat through the small clip quickly. Secondary (Psychosis): A secondary shot unloads an entire clip into a target at once. The overdose of sedatives will cause the target to confuse enemy units as friendlies and vice versa. The affect on human players in the Combat Arena causes their enemy and friendly colours to switch - both on-screen and on the radar. Use it to seriously rack up friendly fire on the opposing team. |
||||||||||||||||||||
SMG
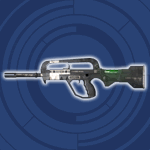
| CMP-150 | ||||||||||||||||||||
|---|---|---|---|---|---|---|---|---|---|---|---|---|---|---|---|---|---|---|---|---|
Primary: Primary fire delivers a rapid shower of rounds, feeling (and sounding) much like the original Perfect Dark's CMP150. It's the most accurate SMG of the lot, so you'll find it handy when the heat's high and ammo's low. Secondary (Hologram): Activate the CMP-150's holoprojector and you'll be treated to seeing an exact copy of your character appear beside you. The holocopy of yourself will follow your every move from reloading to crouching, use it to confuse enemies as they can't tell which of you is the real deal. Just don't use it for too long as your walking speed slows to a crawl while it's active. |
||||||||||||||||||||
| DW-P5 | ||||||||||||||||||||
|---|---|---|---|---|---|---|---|---|---|---|---|---|---|---|---|---|---|---|---|---|
Primary: Wherever the P9P works but enemy numbers don't, use the DW. Its quick fire rate and larger clip can act as a handy backup when Rifles or stronger firepower aren't available. Remember that use of the scope restricts you to manual fire. Secondary (Add silencer): Just like the P9P, use the DW's silencer for quick stealth kills. Make sure you only squeeze off single shots at a time to avoid missing your target and alerting others. Tertiary (Add flashlight): Use the flashlight to find your way through the dark without running into everything. |
||||||||||||||||||||
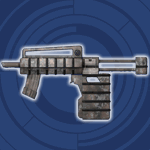
| UGL Liberator | ||||||||||||||||||||
|---|---|---|---|---|---|---|---|---|---|---|---|---|---|---|---|---|---|---|---|---|
Primary: With your basic burst-fire trait, the UGL should only be used when no other gun's available. It's range and firepower make up for the dismal acccuracy, so you should only open fire in close quarters (especially when dual-wielding) to avoid scratching the walls. Secondary (Booby trap): Irritate foes with the UGL's internal booby trap. By activating an explosive charge inside the UGL, any poor soul wandering nearby will trigger a jarring explosion. Watch out for your own booby-trapped UGL, as it can't differentiate between friend and foe. Aim your crosshair at a UGL on the ground, if it turns red you'll know it's armed. A threat detector view will also highlight an armed UGL, and the RCP-90 can reprogram the UGL rendering it harmless. |
||||||||||||||||||||
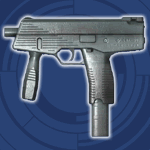
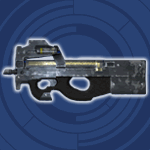
| RCP-90 | ||||||||||||||||||||
|---|---|---|---|---|---|---|---|---|---|---|---|---|---|---|---|---|---|---|---|---|
With a hefty clip and armor-piercing rounds, the P90 can get you out of any jam. Primary: In close quarters the P90 can't do you wrong. Its accuracy will leave more to be desired however, so don't rely on it for long distance aiming. Regulate your shots against enemies up close, as only a few rounds of this beast will tear right through them. Secondary (Threat detector): The P90's crowning feature is the secondary threat detector. Flip the switch (Right Bumper) and you'll spot any enemies or friendlies no matter what environment you're in. Enemies will glow bright red, while allies glow green. Keep in mind that booby-trapped UGLs and active mines will also glow, so you can't miss a beat with this view. Switch it off when firing at distant enemies, as it'll slightly reduce the gun's accuracy. Tertiary (Reprogram): Spot an enemy mine, Laptop sentry gun, booby-trappped UGL or camera? Point your P90 at it and wait for the word "Reprogram" to appear. Hit A and watch as the gun magically disables the object, allowing you to pass by unhindered. |
||||||||||||||||||||
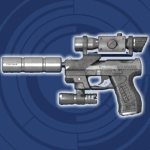
Assault
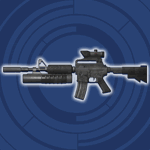
| Laptop | ||||||||||||||||||||
|---|---|---|---|---|---|---|---|---|---|---|---|---|---|---|---|---|---|---|---|---|
Primary: The Lapotop's solid rate of fire and large clip make it ideal in close quarters, but lack of a scope leaves its long-range usefullness to the skill of the user. Secondary (Sentry gun): Hit the Right Bumper while aiming at a wall and your character will literally throw the Laptop away, arming its sentry gun function. Use it to guard chokepoints or bases, as the gun will open fire on any enemies wandering close by. If the gun's low enough for you to reach you can always go and pick it up again. Bear in mind that if you arm a second sentry turrent the first will automatically explode. |
||||||||||||||||||||
| FAC-16 | ||||||||||||||||||||
|---|---|---|---|---|---|---|---|---|---|---|---|---|---|---|---|---|---|---|---|---|
Primary: Use the FAC's steady fire rate against single targets, always aiming for headshots to preserve ammo (especially against armoured opponents). When using the scope the gun reverts to a single shot manual fire mode so don't go wasting shots against distant targets running around. Secondary (Grenade): When enemies gang up on you and cluster together, send them this explosive present. You can only have a total of five, so use them wisely and ensure the impact zone is well enough away from your position to avoid singed eyebrows. Tertiary (Add silencer): Use the silencer when taking down opponents from afar without being spotted. |
||||||||||||||||||||
| KSI-74 | ||||||||||||||||||||
|---|---|---|---|---|---|---|---|---|---|---|---|---|---|---|---|---|---|---|---|---|
Primary: Shred unarmored foes with this beast and slow down armored assailants. Not the best for accuracy, use it in tight areas around chokepoints when the enemies just don't stop coming. Without a scope you'll need practice and skill to use it long-range. Secondary (Bayonet shot): Secondary fire ejects a sharp spike from below the gun's barrel, just make sure your aim is true as you'll only have a single bayonet. Grab another KSI on the ground to reload the shot. Best used to pierce an opponent's armor. |
||||||||||||||||||||
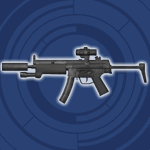
| SuperDragon | ||||||||||||||||||||
|---|---|---|---|---|---|---|---|---|---|---|---|---|---|---|---|---|---|---|---|---|
Primary: Keep your eye on the SuperDragon's clip, as it has the smallest clip size of all SMGs and Rifles. The built-in scope's zoom outclasses most other weapons, just be careful when using it as automatic fire still works when zooming in. With mid-range accuracy and damage you'll find it handy in most situations. Secondary (Bounce grenades): Use grenades against packs of enemies as they rush through narrow doors and corridors. The grenades have limited bouncing capabilities, so try to use them around corners against unsuspecting foes. Just don't launch one at a dropship's engine pods as it'll harmlessly bounce off before exploding. Tertiary (Nightvision): Flip this on for a standard nightvision view for use in low-lit areas. |
||||||||||||||||||||
Heavy
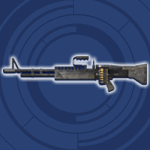
| M60 | ||||||||||||||||||||
|---|---|---|---|---|---|---|---|---|---|---|---|---|---|---|---|---|---|---|---|---|
Primary: With a massive clip size the M60's best used for suppressive fire against multiple enemies and heavy vehicles. Its lack of accuracy and huge recoil rate while firing doesn't do well against distant single enemies, but get in range and you're a force to be reckoned with. Don't reload until your clip is almost dry, as no other weapon takes as long to reload as this. Secondary (Caltrops): Lined up in groups, these little proximity explosives can wreck havoc on pursuers (remember, no-one can jump over them) and enemy vehicles. Use them in chokepoints when retreating from multiple hostiles or setting up a guard perimeter. |
||||||||||||||||||||
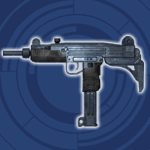
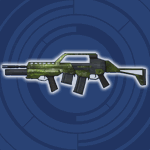
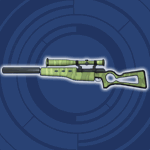
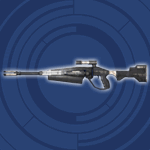
| Jackal | ||||||||||||||||||||
|---|---|---|---|---|---|---|---|---|---|---|---|---|---|---|---|---|---|---|---|---|
Primary: Just a single shot in each clip gives you an idea of how strong this baby is. Very few enemies can withstand a single shot from the Jackal, especially with a headshot. The reload time will slow down your attacks so pick your targets wisely and make sure you've got enough cover nearby. Slowly pull and release the Left Trigger while zooming as you don't want to peer through it with maximum zoom on all the time. Secondary (EMP marker - Combat Arena only): This feature will serve snipers well in the Combat Arena. Switch it on while sneaking around opponents to scramble their radar and reveal their position to your teammates, no matter if they're making noise or not. |
||||||||||||||||||||
| Plasma Rifle | ||||||||||||||||||
|---|---|---|---|---|---|---|---|---|---|---|---|---|---|---|---|---|---|---|
Primary: The Plasma Rifle emits small blue balls of energy with each shot of which not many can withstand. The energy bolt will also cause limited splash damage to anything nearby, so be careful to make sure you're not near the impact point of the blast. The gun will automatically recharge itself back up to 200 when not in use, so make sure you don't run out of energy in the middle of a firefight. Secondary (Cloak): Render yourself completely invisible to enemies with this trick. Watch your ammo meter when cloaked as it drains a heck of a lot faster than while firing the weapon. If you attack an enemy with a melee attack or fire the rifle you'll temporarily decloak. |
||||||||||||||||||
| Shockwave Rifle | ||||||||||||||||||||
|---|---|---|---|---|---|---|---|---|---|---|---|---|---|---|---|---|---|---|---|---|
Primary: Unleash a deadly and piercing bolt of energy with this monster. With a scope rivalling the Jackal's and an almost instant hit fire-rate, not much can escape from your sight. Give yourself several seconds between each shot, as after three rapid discharges it'll overheat and take several seconds to cool down. Don't waste your ammo either as after 30 shots the power cell can't be recharged. Secondary (X-ray): Reveal the position of all characters within range with this feature. You'll see characters by their skeletons, even targets at incredible distances from you. Use it to aim your shots carefully while moving around for a clear line of sight (this ain't no FarSight so you sadly can't shoot though walls). |
||||||||||||||||||||
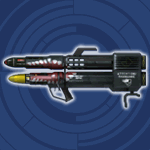
| Rocket Launcher | ||||||||||||||||||||
|---|---|---|---|---|---|---|---|---|---|---|---|---|---|---|---|---|---|---|---|---|
Primary: Don't bother using the Rocket Launcher indoors as the splash damage each rocket delivers is something you don't want to be caught in. The sheer size of each rocket means you won't have many to carry, so use them wisely against vehicles or heavy armarments. Secondary (Fly-by-wire): When a regular flying rocket won't do, why not pilot it yourself? The secondary mode switches to a remote view of the rocket, from here you can direct the rocket around and detonate it by pulling the Right Trigger. Don't keep it in the air too long though as the limited fuel supply will run dry and stop your rocket in its tracks. Keep in mind that you're still open to attack while piloting a rocket. |
||||||||||||||||||||
Close combat
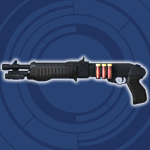
| DEF-12 Shotgun | ||||||||||||||||||||
|---|---|---|---|---|---|---|---|---|---|---|---|---|---|---|---|---|---|---|---|---|
Ultimate stopping power gives the Shotgun revered status in close-quarter combat. Primary: Not much can withstand a single blast from the muzzle of this noisemaker. If you shot goes wide against an armored opponent they'll be lucky to keep some of their armor intact. Keep its use restricted to small tight areas, as the range of the blast weakens considerably the further your enemies are. Use it in tandem with X-Ray Goggles for easy ambushes around corners. Secondary (Radar Sweep): Give yourself a personal radar with this feature. Friendlies appear as green dots, enemies as red (only when they fire loud weapons). That loud repetitive pulsing sound associated with the radar means you'll be visible to enemy radar while using it, so don't keep it on too long. Tertiary (Mimic - Combat Arena only): Turn this feature on to confuse opponents. Instead of showing up as a red dot on their radar, you'll appear as green as though you were a fellow teammate. |
||||||||||||||||||||
| Combat Shield | ||||||||||||||||
|---|---|---|---|---|---|---|---|---|---|---|---|---|---|---|---|---|
A standard lightweight shield capable of protecting users from melee attacks and limited protection from firearms. Primary: When holding a shield without a weapon all you can do is raise it to head height by holding the Left Trigger. The shield will protect you from pesky soliders attacking with their fists and it'll provide limited protection from live fire. The clear section of the shield will slowly break down when shot at, once it fails you'll need to find another shield. When an opponent carries a shield you can either disarm them with your fists or shoot at their exposed feet to break through. Secondary (Dual wield): Any dual-wieldable weapon can be used alongside the shield. Left Trigger will still raise the shield to head level, so you can't zoom with your weapon. Keep in mind that secondary fire and the Combat Roll will be disabled while dual-wielding. Crouch down and raise the shield to stop enemies from shooting at your exposed feet. |
||||||||||||||||

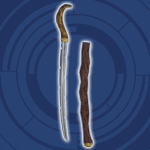
| Viblade | ||||||||||||||||
|---|---|---|---|---|---|---|---|---|---|---|---|---|---|---|---|---|
Primary: Pull the Right Trigger rapidly for a series of quick slashes and swings with the blade. Naturally it only works in close range against unsuspecting foes. The lethal damage it inflicts against both armored and unprotected enemies make it ideal for fast attacks. Secondary (Deflect): Hold the Right Bumper to emit an impenetrable barrier from the Viblade, capable of protecting the user from all projectile weapons. After some time the blue symbols etched on the sword near the hilt turn red before the shield's power fails. Take cover while the shield recharges. |
||||||||||||||||
Thrown
| Hawk boomerang | ||||||||||||||||
|---|---|---|---|---|---|---|---|---|---|---|---|---|---|---|---|---|
An experimental weapon perfect for those rare times when you need a self-guiding razor-sharp spinning blade. Primary: The Hawk releases a metal blade capable of bouncing off struck surfaces. It's not much use just launching it away from yourself as chances are pretty slim of it hitting anything. Therefore if you hold the Left Trigger over an enemy target and wait for a yellow outline to appear around them, fire the weapon and the blade will attempt to home in on its target. If you're separated from the blade during its adventurous flight, wait for the number in the center of the launcher to count down from 5. When it displays an "R" the blade will automatically return to you. Used effectively this razor-sharp package can drop unarmored foes in seconds. Secondary (Shrapnel shield): Hold the Right Bumper to emit a funky shield around yourself. As long as the shield is active you'll be protected from splash damage caused by explosive weaponry. This includes complete protection from Plasma Rifle fire, keep that in mind next time you face Mai Hem's Phantoms. |
||||||||||||||||
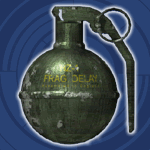
| Frag Grenade | ||||||||||||||||||||
|---|---|---|---|---|---|---|---|---|---|---|---|---|---|---|---|---|---|---|---|---|
Primary: Pull the Left Trigger to throw a grenade (Right Trigger fires your dual-wielded weapon). A standard five second timer counts down before the grenade blows, so if you want it to detonate upon impact, hold the Left Trigger and wait for the timer on-screen to reach zero. Just make sure the grenade doesn't land nearby. Use it against packs of enemies cramped in close quarters, or against enemy hovercrafts or turrets. Secondary (Dual wield): Any dual-wieldable gun can be used alongside a grenade, just remember that Left Trigger will throw the grenade instead of zooming in. |
||||||||||||||||||||
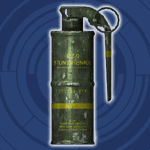
| Flashbang | ||||||||||||||||||||
|---|---|---|---|---|---|---|---|---|---|---|---|---|---|---|---|---|---|---|---|---|
Primary: Throw this special grenade among enemies before making your move. Quickly look away from the grenade as it blows, any foes within range will be blinded momentarily. If you're caught in a blast your screen will turn completely white for a few seconds before your sight returns. Try disarming enemies quickly while they're stunned, or use a weapon capable of taking them down quickly before they can recover and retaliate. Secondary (Dual wield): Like the standard grenade, dual-wielding a weapon alongside a flashbang can give you an extra edge. |
||||||||||||||||||||
| Multi-Mine | ||||||||||||||||||||
|---|---|---|---|---|---|---|---|---|---|---|---|---|---|---|---|---|---|---|---|---|
Primary: Hit primary fire to quickly throw a mine on the ground, walls or ceiling. The mine will explode when anyone wanders close by, be it friend or foe, so watch out where you set them up. Try to hide them among cluttered environments where they'll be hard to spot. Keep in mind that threat detectors will easily reveal live mines with a red highlight. Secondary (Remote): Hit the Right Bumper to set a remote mine. The mine will remain where it is (without a proximity detonation) until you pull the Left Trigger to set it off. Plant a bunch of mines around hotspots or chokepoints before giving foes a surprise welcome. |
||||||||||||||||||||
Other
| Unarmed |
|---|
| When ammo's running low or quick attacks are your game, take the fight to the enemy with your bare hands. Primary: Swing a standard punch in hand-to-hand combat (Press Up on the D-pad to holster your weapon). Unless attacking from behind you'll need a few scored punches to knock out an opponent. Remember that with your weapon holstered you'll be able to run around faster than at any other time in the game. Secondary (Disarm): Whack an enemy with a disarm move and watch their weapon fly from their arms. If you have enough free slots in your inventory you'll automatically pick up their weapon, otherwise it'll fall harmlessly to the ground. A great way to irritate opponents in the Combat Arena, if you use it against AI opponents in the story mode they'll be knocked over helplessly. Watch out though as more often than not they'll pull out a Falcon or P9P. |
| Stationary Turret |
|---|
| Use a turret to fortify your position. Primary: Stand-alone stationary turrets work in exactly the same way as the Hovercraft's turret. You'll have unlimited ammo while using one and can use either the M60, Rocket Launcher or the Plasma Rifle. Just watch your shots though, as even though the turret grants unlimited ammo, it will drain what's left in your M60 or Rocket Launcher when you dismount. Press A while standing behind the turret to mount it, and hold the Left Trigger to zoom. Hit A again to jump off. |
No copyright infringements intended. See the About section for more legal information.
Page last updated: 28 November 2011, 03:46 GMT